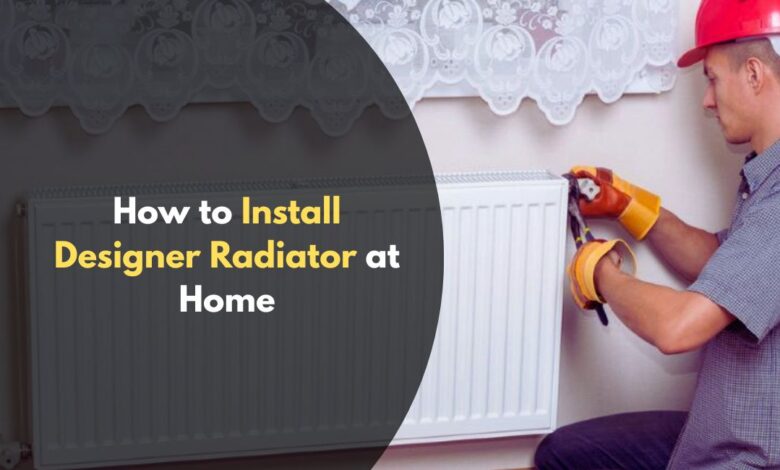
Considering an upgrade to a radiator that is stylish as well as energy-efficient?
One of the best ways to enhance overall comfort, along with interior styling, is the installation of a designer radiator. This guide covers all essential aspects, whether replacing an old unit or installing a new one, including the benefits, tools required, and detailed steps to accomplish the task effectively.
What Is a Designer Radiator?
A designer radiator is a contemporary extra heating solution, combining excellent performance with a stylish design, offering unique shapes, materials, and finishes that enhance the beauty of any room; thus, it makes an excellent option to replace an old radiator.
While providing warmth, a decorative radiator also becomes part of the interior space functional, artistic piece. Designed to provide effective warmth and enhance the inner aesthetic, this type of radiator, including electric radiators, is available in many designs from slim vertical panels to massive sculptural forms.
Many contemporary UK radiator collections feature modern radiators that fit every space, be it a compact option for a hallway or a focal point for a living room. Designed to harmonize with your décor and help coordinate other elements in the house, especially when combined with elegant radiator valves, these can even enhance modest spaces, giving an uninterrupted and classy ambiance throughout your home
Benefits of Designer Radiators
Modern radiators combine style and functionality, offering efficient warming alongside modern aesthetics. Made from high-performance materials such as aluminum and steel, they provide benefits like faster heating, energy savings, and better use of space, all while enhancing the visual appeal of your home. You can also buy these from your nearest online store
1. Enhanced Comfort and Efficiency
Fast, Efficient Heating: Electric radiators provide rapid heat output for any room.
Aluminum and steel- the most popular materials in modern radiators are very effective heat conductors which means that rooms heat up faster and more gradually than in case with traditional radiators.
Lower Energy Usage
Most designer models use less water and heat the space more effectively, so they are energy efficient and may reduce heating costs.
Heat retention is indeed an important factor of efficiency in systems for raising the temperature inside buildings.
Steel radiators, especially, hold the heat well so that even when the heater is turned off, your room still remains warm.
2. Stylish Design & Visual Impact
Modern Aesthetics
Decorative radiators come in various styles, colors, and finishes. Options are available to complement a minimalist interior or provide a bolder focal point for the room.
Focal Point Feature
In their distinctive designs, decorative radiators can be the focal point in a room so as to add personality and a premium feel to the space.
3. Space Optimization
Vertical Solutions
Vertical modern radiators take up much less room or wall space compared to horizontal models, thus allowing more floor space in the room.
Custom Fit
Radiators are very versatile in that they can be made to suit particular layouts which makes them the best option for spaces like hallways, kitchens, or bathrooms amongst other areas where wall space is restricted.
4. Additional Practical Benefits
Individual Temperature Control
Most modern models come with thermostatic radiator valves (TRVs), which allow you to control the temperature of individual radiators for added comfort and efficiency.
Easy Installation
Designer radiators are generally quite easy to install and can often be fitted into an existing central heating system with hardly any alteration.
What Is Needed to Install a Radiator?
Installing a radiator—whether it’s a designer radiator in your home requires specific tools and materials. Here’s what you generally need for each type of installation below.
Here’s a bit of a more detailed run-down of what you’ll need:
Essential Tools:
- Adjustable Spanners (x2): For tightening radiator valves and connections.
- Radiator Key (or Flat-head Screwdriver): Used to bleed air from the radiator.
- Pipe Cutter: If pipe modification is required.
- Spirit Level: Ensures the radiator is mounted level.
- Screwdriver: For attaching wall brackets and other components.
- Drill / Hammer Drill: To fix the wall brackets securely.
- Masonry Drill Bit: Essential for drilling into tough materials when installing vertical radiators. Required if mounting to a brick or concrete wall.
- Tape Measure: For accurate placement of brackets and pipe alignment.
- Pipe/Cable Detector: A useful tool for plumbers when setting up a new radiator. To avoid drilling into hidden pipes or wiring.
- PTFE Tape (Thread Seal Tape): For sealing threaded valve joints.
Materials & Accessories:
- Radiator Fixing Kit: Mounting brackets, screws, wall plugs, and a radiator bleed key all must have for a successful installation.
- Radiator Unit: The new radiator, which is about to be assembled.
- Radiator Valves (if needed): Mostly when you are replacing or moving.
- Bucket or Drip Tray: Kept under the boiler to catch the water that leaks from the heating system.
- Dust Sheets or Rags: Either mats or pieces of cloth are used for protecting the floor and areas around it.
How to Install a Designer Radiator
Installing a designer radiator does add considerable comfort and aesthetic appeal to a room, but placement, room type, and planning may determine how excellent the results will be. If you don’t have expertise in plumbing, then it’s advisable to involve a professional in the installation process to avoid any leakages or damages.
Step-by-Step Installation Guide
Choose the Right Location
The location of your radiator is important to its heating performance as well as its design impact. Here are some Placement Tips:
- Cold Walls: The coldest wall is the traditional and usually most effective place for it—under a window to fight against drafts and help distribute heat evenly.
- Avoid Direct Obstruction: Do not install it behind furniture or curtains, as this leads to a complete blocking of the flow of heat to the room, which can affect the warranty.
- Tall/ Design Consideration: Avoid putting in tall or sculptural designer radiators in busy places where people might knock against them or in rooms with flooring that restricts airflow such as narrow hallways.
- Make it a Feature: Consult a professional for the best options in installing vertical radiators. In any of the living or dining rooms, putting the designer radiator on a central wall makes it a design feature.
Room-Specific Suggestions:
- Living Room / Drawing Room: Installing vertical radiators can enhance the room’s aesthetic while providing warmth. Make it the focal point by choosing a vertical or sculptural radiator, preferably on a feature wall.
- Dining Room: Install it where it can be seen but not felt too closely (e.g., near the dining table but not directly beside it).
- Bedroom: Low-profile horizontal radiators under windows work best. Go for models that are quiet and efficient.
- Kitchen: Ensure your heating system is efficient to maximize heat output in the kitchen. Choose slim or vertical radiators on unused wall space, away from appliances and cooking zones. Hallways / Entrances: Use narrow vertical radiators for maximum warming with minimal footprint—great for cold entryways.
- Bathroom: Consider installing a small horizontal radiator to save space. Consider towel rail-style designer radiators, ideally near the shower or bath but away from direct water contact, to enhance both style and functionality in your home, raising the temperature.
Tip: Use a tape measure, pencil, and spirit level to mark the exact placement before drilling.
2. Turn Off the Heating & Drain the System
Ensure your central heating system is turned off and completely cooled down before using the radiator bleed key. Close the radiator valves and use a radiator key to bleed the radiator and release trapped air. Place a bucket or drip tray underneath to catch any water.
3. Mark, Drill & Install Brackets
- Use the radiator’s supplied brackets to mark drill points.
- A A 7mm masonry drill bit is recommended for setting up a vertical radiator. and hammer drill is ideal for drilling into brick or concrete.
- Insert rawl plugs, then secure brackets with screws.
4. Mount the Radiator
- Carefully lift and hang the radiator onto the fixed brackets.
- Use a spirit level to check alignment—an uneven radiator can lead to poor temperature and water flow issues.
5. Connect Pipework
- Wrap PTFE tape is essential for sealing connections when replacing a radiator. Use a nut around the valve threads for a watertight seal.
- Use an adjustable spanner and a A radiator spanner is a handy tool for plumbers when adjusting fittings on a new radiator. to connect the radiator to your central heating system.
- Double-check all joints are tight, but be cautious not to overtighten and damage threads.
After Installation
Once everything is connected:
- Refill your heating system if necessary.
- Bleed the radiator again to remove trapped air.
- Turn on your heating and check for leaks or unusual noises, especially around the bleed valve.
Final Notes
- Room Size Matters: Larger rooms may require multiple radiators or higher BTU-rated models. Use a BTU calculator to determine the appropriate output for your space.
- Don’t Overcrowd Radiators: Avoid placing large furniture directly in front of radiators—it can trap heat and reduce efficiency.
- Make It a Feature: Designer radiators aren’t just functional—they’re decorative. Consider visibility when choosing a wall for installation.
Frequently Asked Questions
Which radiator design is best for effective home heating?
It depends on your space and style preference. Vertical designs save room, while panel designs offer a sleek look, both enhancing home heating efficiency. For effective home heating, aluminium radiators are generally considered the most efficient, offering rapid heat transfer and lower water requirements.
What is a designer radiator?
A designer radiator is a type of radiator that prioritizes aesthetics and design alongside its heating function. Unlike traditional radiators, which are primarily functional, modern radiators are chosen for their stylish appearance and ability to enhance a room’s decor. They come in various shapes, sizes, colors, and materials, allowing for a wide range of customization.
How efficient are designer radiators?
Designer radiators can be quite efficient, and in some cases, more so than traditional radiators. Many are constructed from high-performance materials like steel and aluminum, which allow for quick heating and responsiveness to temperature changes.
Where Should I Set Up My Radiator?
For optimal heating, set up your radiator in the coldest part of the room—typically under a window or on an exterior wall. This helps balance temperature by reducing heat loss in draft-prone areas.
How Do I Measure the Width of a Radiator?
Use a tape measure to span the full width from one end to the other, including any end fittings or valve extensions. For larger radiators, it’s helpful to have someone assist to keep the tape straight and accurate.
Conclusion
A well-chosen designer radiator can transform a room, enhancing both its look and heating efficiency. With a wide range of styles available, from classic column radiators to bold modern designs, there’s something to suit every space and budget. Whether you’re looking for a luxury statement piece or an affordable upgrade, UK designer radiator collections offer plenty of options.
Also Read: Conquering Kid Rug Disasters